
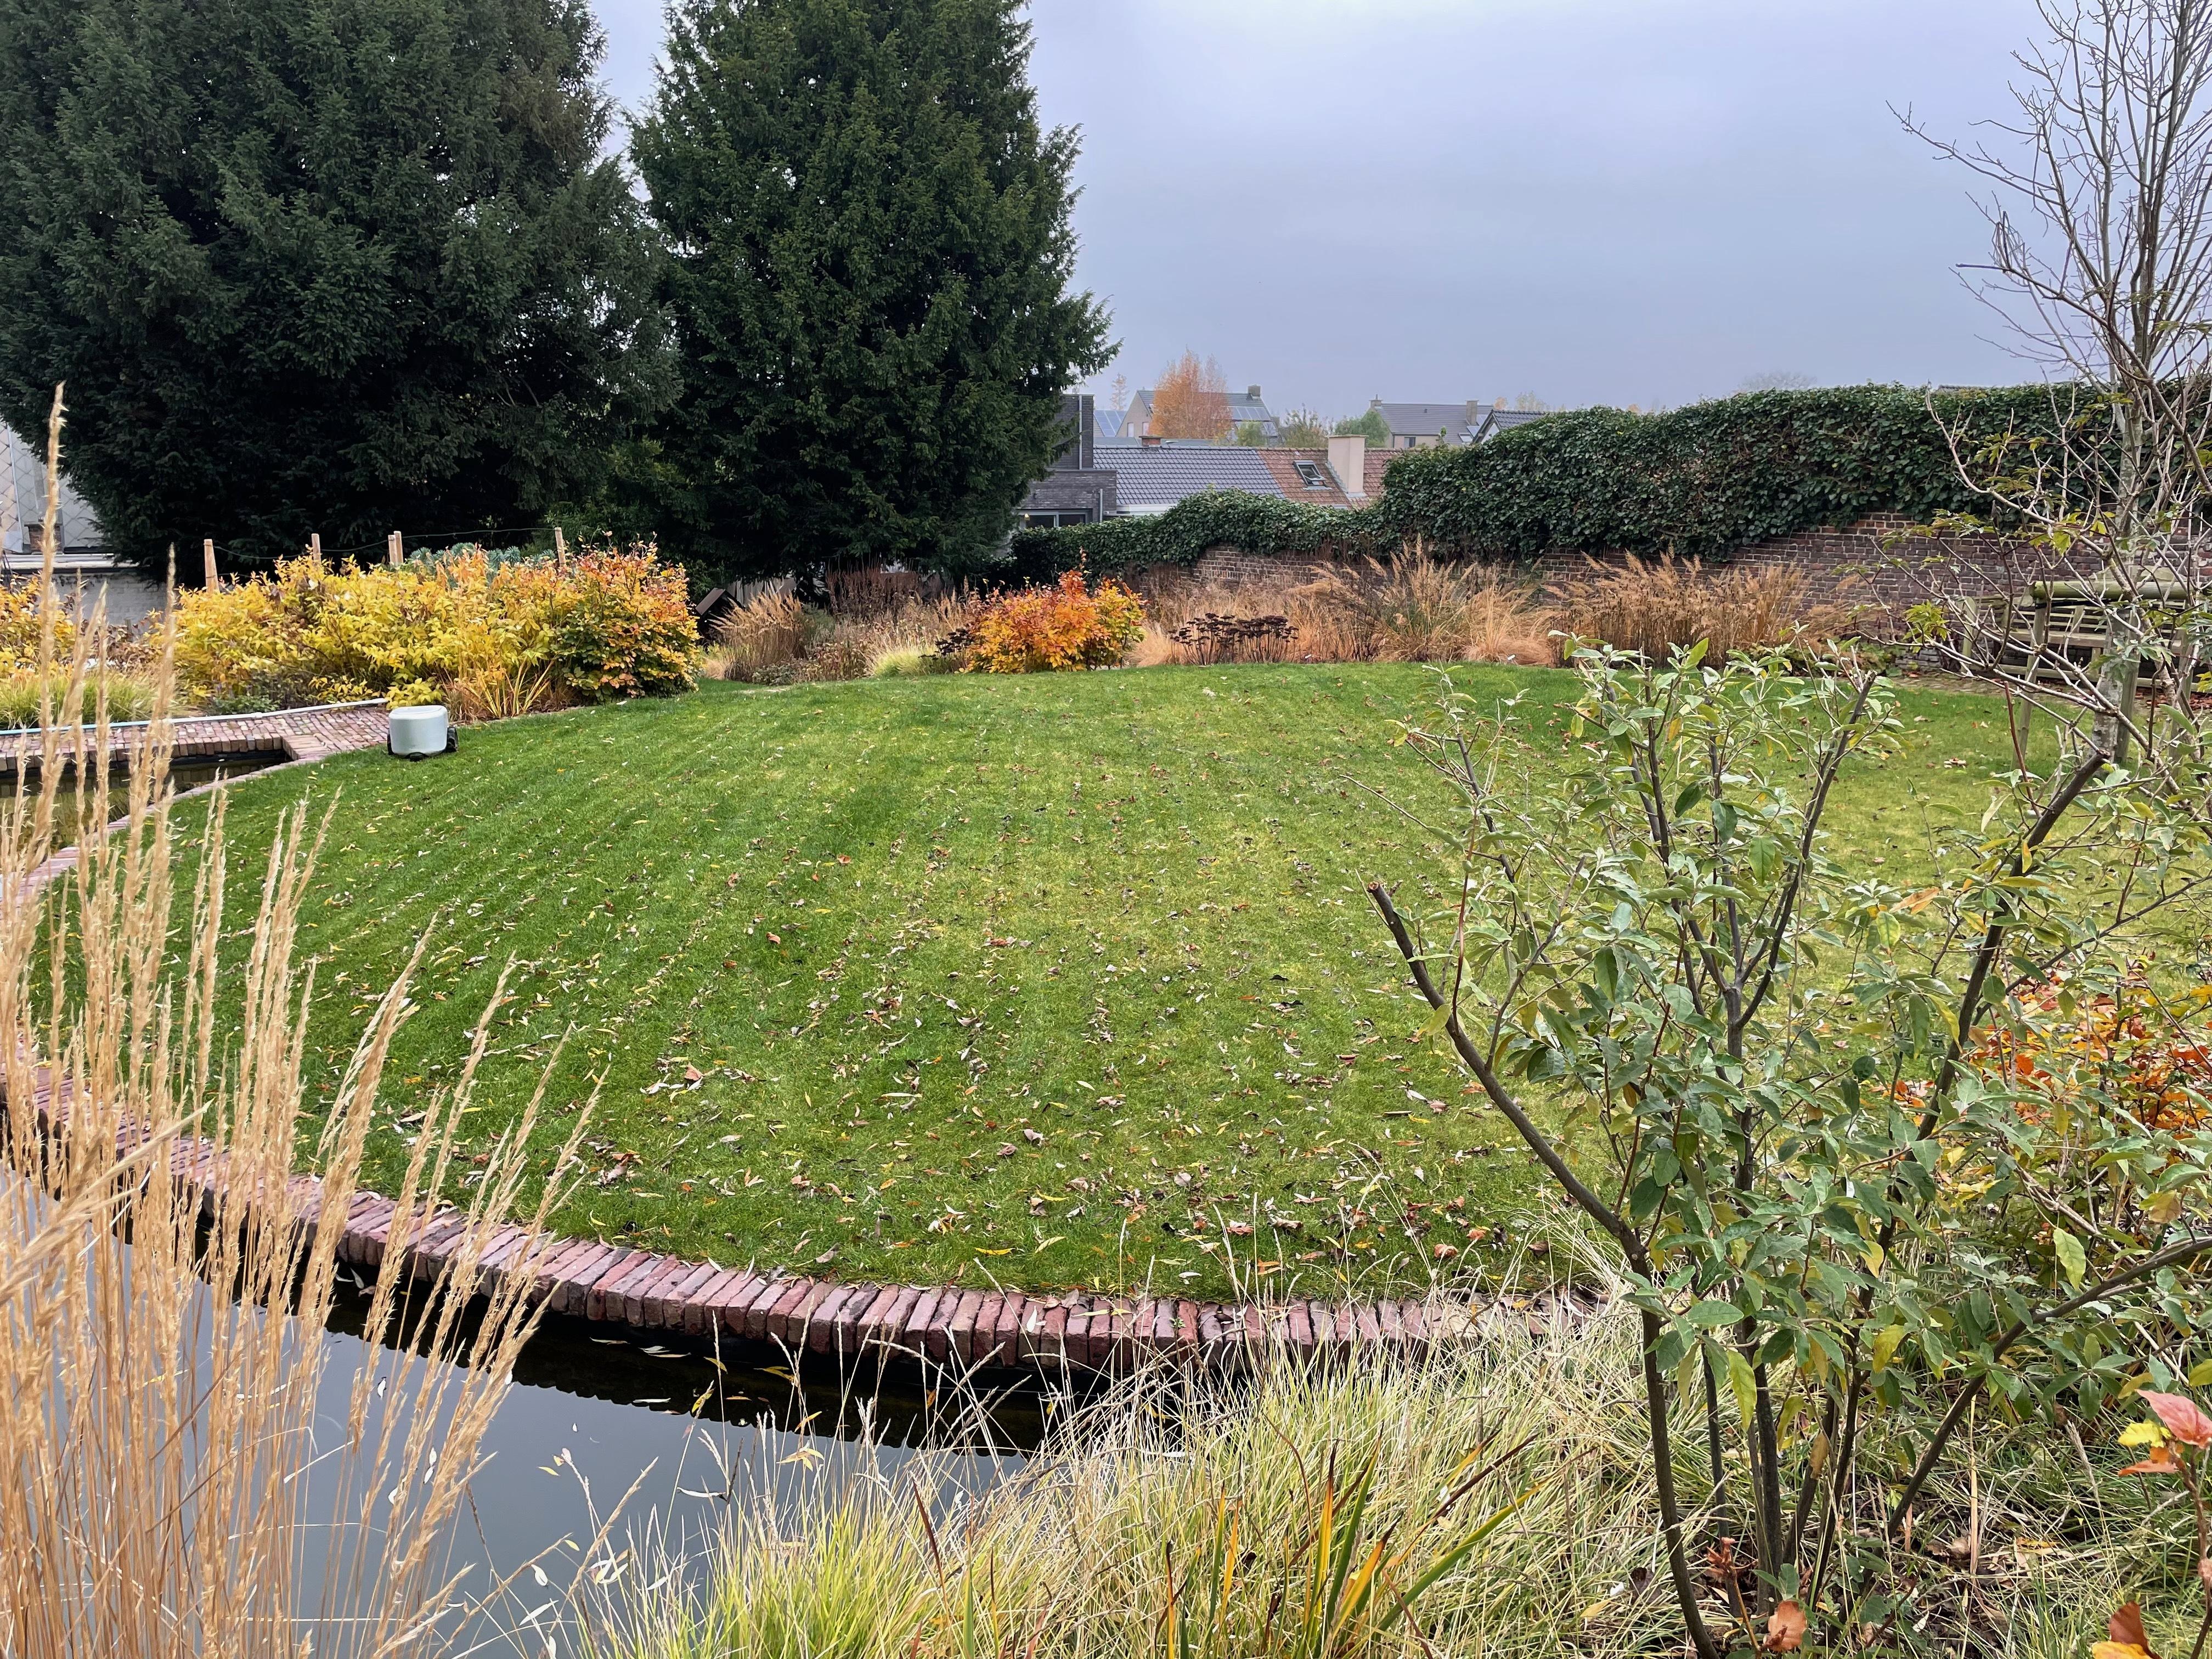
Landscaped gardens guide.


No visible borders
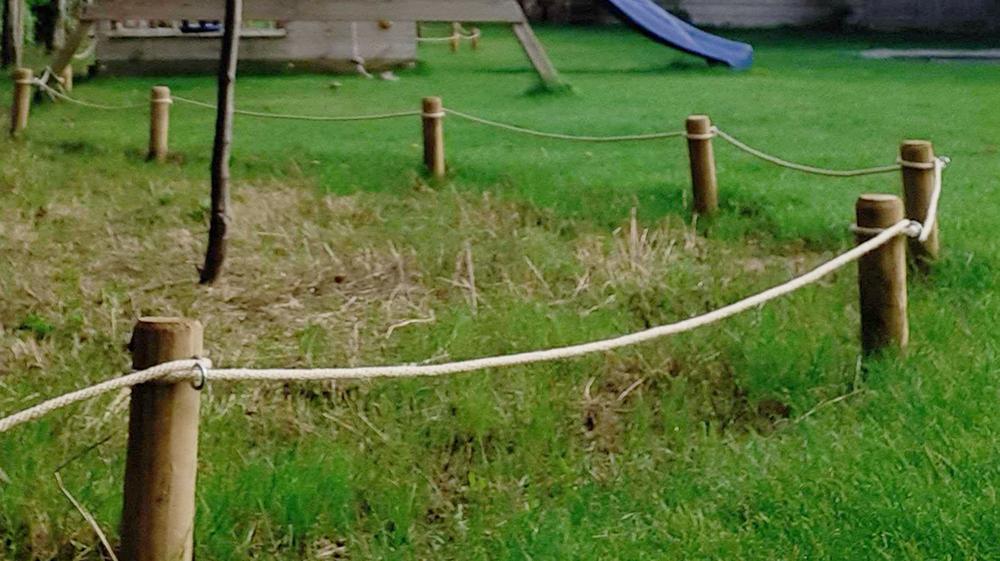
Small wooden blocks creating visual border max. 40cm apart
A visible cord creating visual border
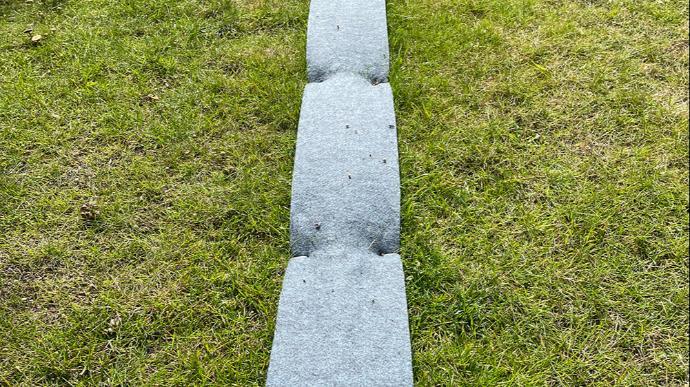
A cloth creating visual border
Case
You want to exclude certain areas where Willow can't mow, for example because of a pond, a swimming pool, wild grasses with flowers,...
Solution 1: No-go zones
Draw a no-go zones over the area where Willow is not allowed to drive. You can easily do that with the Starlight tools in the EEVE app.
Solution 2: Create a visual border for Willow
In case you need high precision: create a visual border.
- Picture 1: Small wooden blocks 40cm apart
- Picture 2: A visible cord
- Picture 3: A cloth separating zones
These are all different borders for Willow. There are many possible boundaries you can create. You can order the border from picture 3 through our support department. Just let us know what amount you'd need and we'll send you a quote.
Water
Solution 1: a border of at least 50cm

Solution 2: create a visual border for Willow to not cross
Case
In case you have a pool/pond/water in your garden that doesn't clearly have a border.
Solution 1: No-go zones
Draw a no-go zones over the area where Willow is not allowed to drive. You can easily do that with the Starlight tools in the EEVE app.
Solution 2: Create a visible border
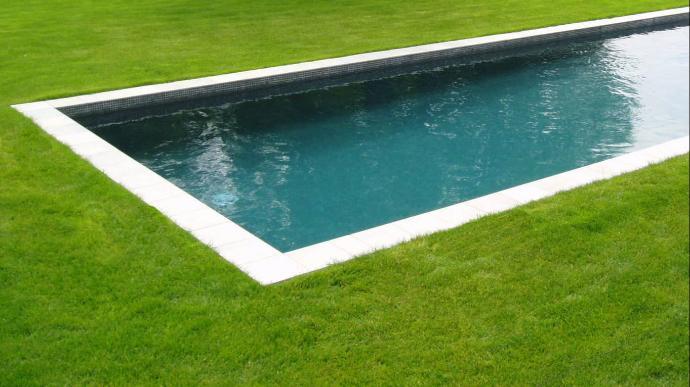
Picture of pool: Create a border that distinguishes the grass from the water. We recommend a border of 50 cm, this will make automatic border mowing possible in the future.
If you keep your grass short and you don't need automatic border mowing, then 25 cm may even be enough. In that case, please do some testing before you let your robot work independently.
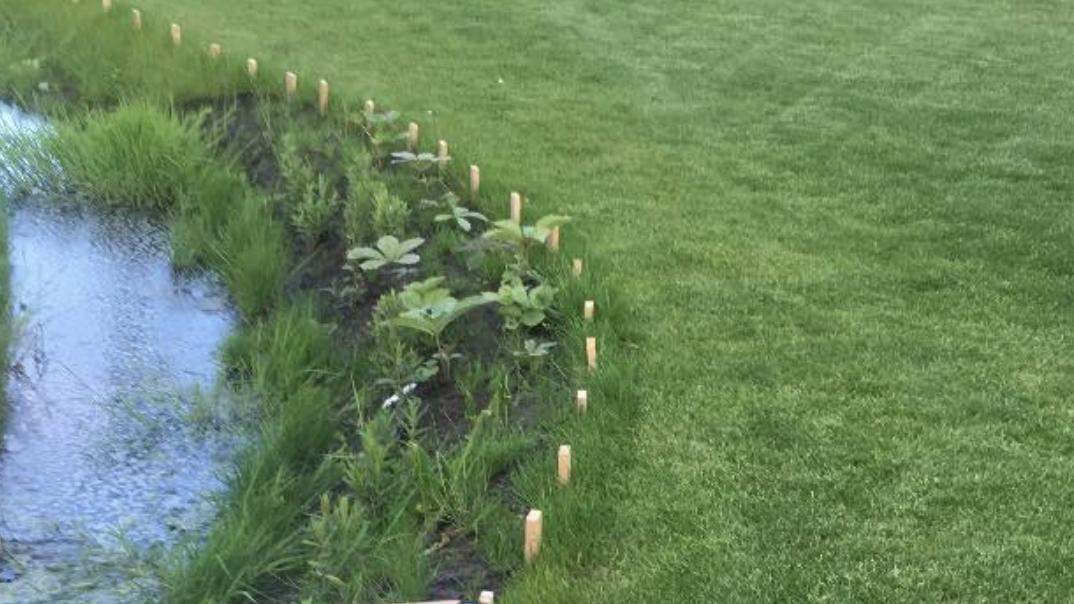
Picture of pond:Create a border that Willow can clearly see and cannot cross. We used wooden blocks here but anything that Willow can see and not go in between is good.
Narrow passages

Case: passage to cross zones
In order for Willow to navigate swiftly in places that are less than 3 meters wide, she needs a helping hand.
- Narrow stretches of lawn: draw a narrow passage with the Starlight tools in the EEVE app.
- Narrow passage to another zone: use Starlight tools to draw portals and grasszones between them.
In narrow passage zones and portals, Willow will take smaller turns to improve navigating.
To go to another zone in your garden, Willow needs to cross a pathway of at least 1 meter wide.
Unknown objects
Case: found an 'unknown' object
It sometimes happens that Willow doesn't recognize an object. But in case she does, you can help us out!
Solution
You can create a recording of the object via Willow's camera. This recording will help us help you! We then train Willow to recognize this new object.
How to?
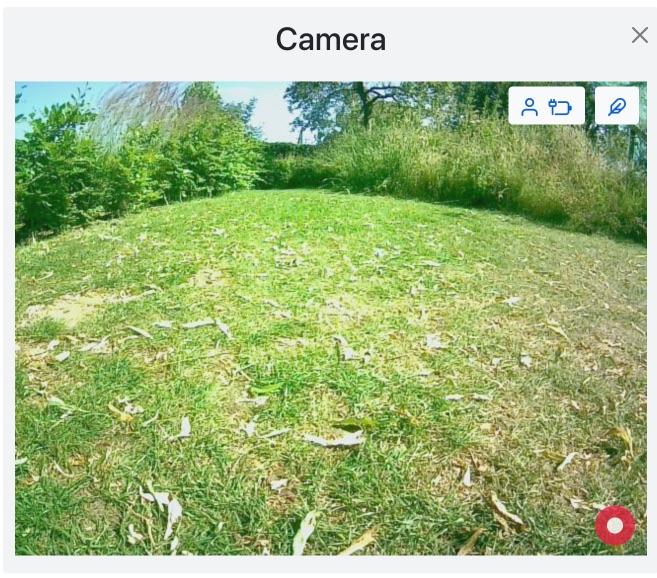
- Drive to the area you want to record
- Click on the red record button at the bottom right of your screen, the last two minutes will be saved (image 1)
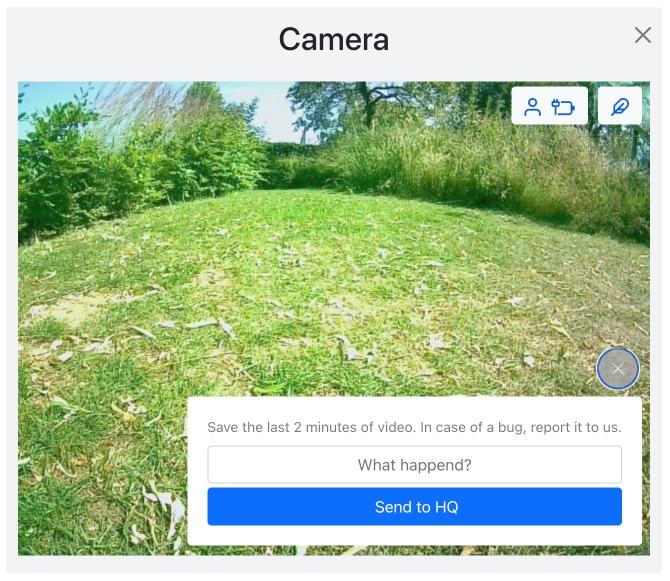
- Write a brief comment to explain your recording (image 2)
- "Send to HQ" (image 2)
Multi-Zone
Case: You have multiple mowing zones
It's called multi-zone if Willow needs to cross a path to go to another grass-zone. If you have multi-zone there are two ways to make it work.
Solution 1: Multi-Zone Installation
Go to our Quick Install Guide.
Make sure to draw seperate zones with the Starlight tools in the EEVE app.
Solution 2: You can drive Willow manually to the zones
You can drive Willow yourself to the other zone to let her mow.
How?
In the EEVE app:
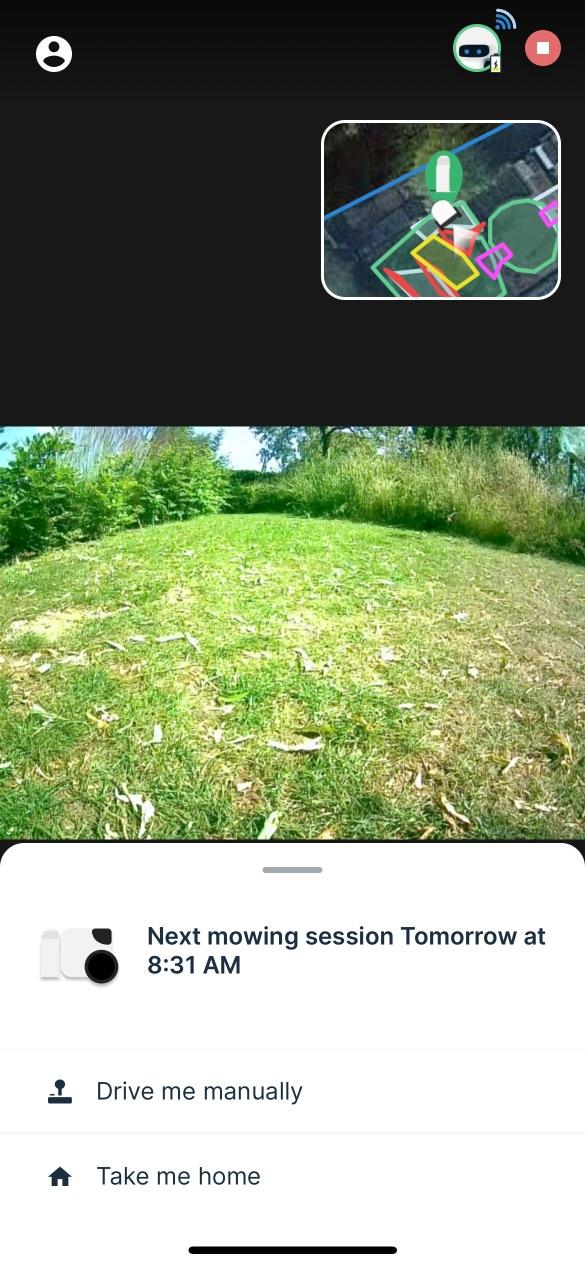
- Swipe up the acitivity tray at the bottom of your screen
- Click on "Drive me manually"
- Drive to second zone
- Stop manual driving by clicking on the square
- Willow will now automatically go in her mowing schedule
Stone pathway or stepping stones
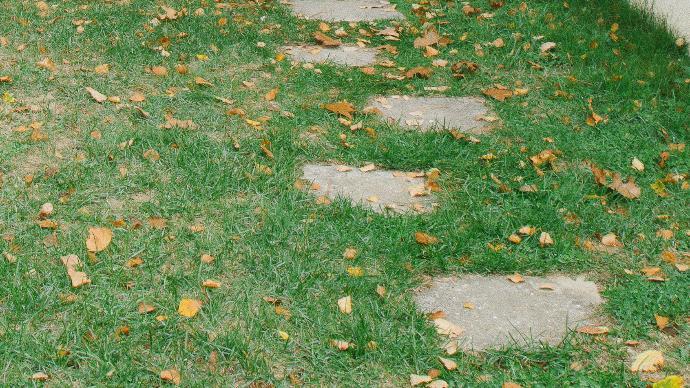
Case
Willow can also mow stone paths in your garden. You just have to indicate this using a "Stepping Stone Zone" in your StarLight map.
Solution: Stepping Stones Zone
Enhance your garden with Willow by creating a "Stepping Stones Zone" using the StarLight tools. This feature allows Willow to gracefully navigate and mow around the stepping stones, merging visual appeal with functional utility in your outdoor space.
Important Reminder: Willow excels in maneuvering around stepping stones when they are accurately mapped in the StarLight system. Make sure that the area around your stepping stones is clear of any obstructions such as loose items, significant level differences, or water features. Incorrect mapping of the "Stepping Stones Zone" may lead Willow off course, risking damage to both your garden and the robot. Additionally, misuse of this functionality could invalidate your warranty.
Follow this refined guide to perfectly set up your "Stepping Stones Zone":
Step 1: Access StarLight Tools
Open the StarLight tools on the app.
Step 2: Head to the Map Editor
Within the StarLight tools, look for and select the option to go into the Map Editor. This is your starting point for visualizing your garden and identifying different zones.
Step 3: Open the 'Zones' Feature
Find and click on the edit button next to "Zones" in the interface. This allows you to view and edit the mowing zones configured in your garden.
Step 4: Add a 'Stepping Stones Zone'
Click the "Add Stepping Stones Zone" button to initiate. Trace the area surrounding the stepping stones. This action directs Willow on where to mow, ensuring it trims the grass around the stepping stones for a polished look.
Accuracy is key here—cover all the stepping stones and their immediate grassy borders to maintain aesthetics without compromising the safety of your robot or garden elements.
Step 5: Save Your Adjustments
After setting your "Stepping Stones Zone," click "Save" to update Willow's navigation map with your changes.
Step 6: Perform a Test Mow
Launch a mowing session to test how Willow manages the "Stepping Stones Zone." Adjust the settings as necessary to fine-tune performance. Our customer support team is on standby to assist with any challenges.
Line mowing
Beta version
Line mowing is an efficient way to cover large areas and it gives a finished and clean look to your lawn.
Today line mowing is a daredevil feature and can be activated under the daredevil tab in the Remote Control.
Today line mowing is beta function. As soon as it will be moved out of beta, stability will improve and more patterns will be available!
Border mowing
Autonomous Border Mowing
Activating border mowing with Willow allows your robot to neatly trim the borders of your lawn, giving it a professional and clean appearance. By adding "Mow border" zones using the StarLight tools, you can easily control where Willow trims the borders.
WARNING: Willow is programmed to drive over borders only where stone floors are visible. If your lawn's border is adjacent to stairs, a ledge, or any area where there might be a sudden change in elevation that could cause Willow to fall, you must avoid drawing the "Mow border" zone over these areas. Willow may interpret this as permission to drive over such regions, leading to potential damage or malfunction. Please be aware that misuse of the "Mow border" feature in such instances will void your warranty.
Here's how you can do it:
Step 1: Open the StarLight Tools
- On your computer, tablet, or smartphone, open the StarLight tools.
Step 3: Click on the edit button next to 'Zones'
- Find and click on the edit button next to "Zones" in the drop-down menu.
- This will allow you to view and edit the different mowing zones for your lawn.
Step 4: Create a 'Mow Border' Zone
- Click on the "Add Mow Border Zone" button.
- Use your finger or mouse to draw the zone on top of the region where you want Willow to mow the borders.
- Adjust the size and shape of the zone as needed to accurately cover the borders of your lawn.
Step 5: Save and Sync
- Once you've drawn the "Mow border" zones, click the "Save" button to store the changes.
Step 6: Verify Operation
- Start a mowing session with Willow to see the border mowing in action. Adjust the zones as needed for optimal performance.
- If you encounter any issues, contact customer support.
Congratulations! You've successfully activated border mowing on your Willow lawn mowing robot. Enjoy the precisely trimmed edges and the enhanced beauty of your lawn.